

If you’ve been missing the thick, chewy crust of a great pizza since going gluten-free, this Gluten-Free Pizza Dough Recipe is for you. Made with gluten-free flour, instant yeast, olive oil, and a few pantry staples, this homemade dough creates a soft, chewy pizza crust with beautifully golden edges.
Unlike traditional wheat-based pizza dough, this gluten-free version doesn’t require kneading. Everything comes together in a stand mixer, and the dough is shaped directly on parchment paper after rising.
Whether you’re making a classic cheese pizza, adding your favorite vegetables, or preparing a crust to freeze for later, this recipe gives you a practical way to enjoy homemade gluten-free pizza.
The dough is naturally egg-free and dairy-free before toppings are added. Just make sure your gluten-free flour blend is suitable for yeast baking and that any toppings are also gluten-free if you’re preparing the pizza for someone with celiac disease.
Table of Contents
Why You’ll Love This Gluten-Free Pizza Dough Recipe
A homemade gluten-free pizza crust should be more than a thin, fragile base. This recipe is designed to create a pizza with a pleasantly chewy center and golden edges.
- Soft and chewy texture: The flour blend, yeast, and olive oil create a satisfying crust.
- No traditional kneading: The dough is mixed using a paddle attachment rather than kneaded like wheat dough.
- Easy ingredients: The recipe uses gluten-free flour, instant yeast, baking powder, and simple pantry staples.
- Thick homemade crust: The dough is shaped into approximately a 15-inch pizza base.
- Flexible toppings: Add cheese, vegetables, sauce, or your preferred pizza toppings.
- Freezer-friendly: Both risen dough and partially baked crusts can be frozen.
- Egg-free dough: No eggs are required in the original dough.
- Dairy-free dough: The crust itself contains no dairy ingredients.
The original dough is sticky when first mixed. That’s normal. Gluten-free dough behaves differently from conventional pizza dough, so the method relies on mixing, rising, and gently shaping rather than stretching.
Gluten-Free Pizza Dough Ingredients
The flour blend is one of the most important elements of this recipe. Not every gluten-free all-purpose flour behaves the same way, particularly in yeast-based baking.
Gluten-Free All-Purpose Flour
Use 2½ cups (310 g) gluten-free all-purpose flour containing xanthan gum.
The original recipe recommends flour blends such as Pillsbury or Better Batter. Check the product label and manufacturer instructions to make sure your chosen blend is suitable for yeast baking.
Gluten-free flour blends vary in their starches, protein content, binders, and moisture absorption. Substituting another blend may change the dough’s texture.
Baking Powder
Use 1 tablespoon (12 g) baking powder.
The baking powder provides additional leavening alongside the yeast.
Salt
Use 1 teaspoon (6 g) salt to season the dough.
Instant Yeast
Use 2¼ teaspoons (7 g) instant yeast, also called rapid-rise yeast.
Check the expiration date before baking. Fresh, properly stored yeast is important for a reliable rise.
Warm Water
Use 1½ cups (360 ml) warm water, approximately 110°F to 115°F (43°C to 46°C).
The original ingredient list contains an inconsistent cup measurement, but the detailed method specifies 1½ cups, which matches 360 ml.
Use a kitchen thermometer if possible. Water that is too hot may damage the yeast.
Granulated Sugar
Use 1 tablespoon (12 g) granulated sugar.
The sugar dissolves in the warm water before being mixed into the flour.
Olive Oil
Use ½ cup (120 ml) olive oil.
Olive oil adds richness and helps create a tender dough.
Apple Cider Vinegar
Use 1 teaspoon (5 ml) apple cider vinegar.
This ingredient is part of the original dough formula and should be included unless you are specifically testing a variation.
Extra Gluten-Free Flour for Shaping
Use 2 tablespoons (16 g) additional gluten-free all-purpose flour for dusting.
This helps prevent the sticky dough from adhering to your hands and parchment paper.
How Is Gluten-Free Pizza Dough Different?
Traditional pizza dough develops elasticity through gluten, a protein network formed when wheat flour is hydrated and worked.
Gluten-free dough does not develop that same network. Instead, it relies on the properties of the flour blend, starches, binders, hydration, and mixing method.
Why Xanthan Gum Matters
Xanthan gum is commonly included in gluten-free baking blends to help provide structure and cohesion.
Use a flour blend that already contains xanthan gum as specified in the original recipe.
Why the Dough Is Sticky
This recipe uses a relatively hydrated mixture that is much softer than conventional pizza dough.
The dough is meant to be shaped by gently pressing and patting rather than stretching or tossing.
Why the Crust Is Baked Twice
The crust is baked once without toppings and then baked again after sauce, cheese, and other ingredients are added.
This helps the base develop structure before carrying the extra moisture and weight of the toppings.
Equipment You’ll Need
- Stand mixer with paddle attachment
- Large ovenproof bowl
- Plastic wrap
- Clean kitchen towel
- Kitchen thermometer
- Measuring cups and spoons
- Large sheet of parchment paper
- Pizza pan or baking sheet
- Oven
How to Make Gluten-Free Pizza Dough Step by Step
Step 1: Prepare a Warm Place for Rising
Use your oven’s proofing setting if available.
If your oven does not have a proofing setting, the original method suggests briefly heating it and turning it off once it reaches approximately 100°F (38°C).
The goal is a gently warm environment, not an actively heated oven. Avoid placing the dough in an oven that is still too hot.
Step 2: Combine the Dry Ingredients
In the bowl of a stand mixer fitted with the paddle attachment, combine:
- 2½ cups gluten-free all-purpose flour with xanthan gum
- 1 tablespoon baking powder
- 1 teaspoon salt
- 2¼ teaspoons instant yeast
Mix briefly so the dry ingredients are evenly distributed.
Step 3: Warm the Water
Warm 1½ cups (360 ml) water to approximately 110°F to 115°F.
The original preparation suggests microwaving the water for approximately 30 to 45 seconds, but the exact time depends on your microwave and starting water temperature.
Check with a kitchen thermometer.
Step 4: Dissolve the Sugar
Stir 1 tablespoon granulated sugar into the warm water until dissolved.
Step 5: Add the Water to the Flour
With the stand mixer running on low speed, slowly add the warm sugar water to the dry ingredients.
Continue mixing as the ingredients combine.
Step 6: Add the Olive Oil and Vinegar
Add ½ cup olive oil and 1 teaspoon apple cider vinegar.
Mix on low speed for approximately 1 to 2 minutes, or until the dough forms a cohesive, sticky mixture.
Unlike wheat pizza dough, this mixture does not need traditional hand kneading.
Step 7: Let the Dough Rise
Transfer the sticky dough to a greased ovenproof bowl.
Cover with plastic wrap and a clean kitchen towel.
Place the bowl in the gently warm, turned-off oven or proofing environment for approximately 30 minutes.
Step 8: Preheat the Oven
Remove the risen dough from the oven.
Preheat the oven to 425°F (218°C).
Step 9: Prepare the Parchment Paper
Place a large sheet of parchment paper on your work surface.
Dust the parchment with approximately 1 tablespoon of the reserved gluten-free flour, spreading it into a circle about 15 inches wide.
Step 10: Shape the Dough
Turn the dough onto the prepared parchment paper.
Sprinkle the remaining tablespoon of gluten-free flour over the top.
Using lightly floured hands, gently pat the dough outward from the center to create an approximately 15-inch round.
Use your fingertips to form a slightly raised edge around the crust.
Because gluten-free dough lacks the same elasticity as wheat dough, avoid pulling or stretching it aggressively.
Step 11: Bake the Pizza Crust
Carefully transfer the parchment paper and shaped dough to a pizza pan or baking sheet.
Bake at 425°F for 15 minutes.
This first baking stage helps the crust set before adding toppings.
Step 12: Add Sauce and Toppings
Remove the crust from the oven.
Add gluten-free pizza sauce, cheese, and your preferred toppings.
Avoid adding excessive sauce or wet toppings, which may affect the texture of the crust.
Step 13: Finish Baking
Return the pizza to the oven.
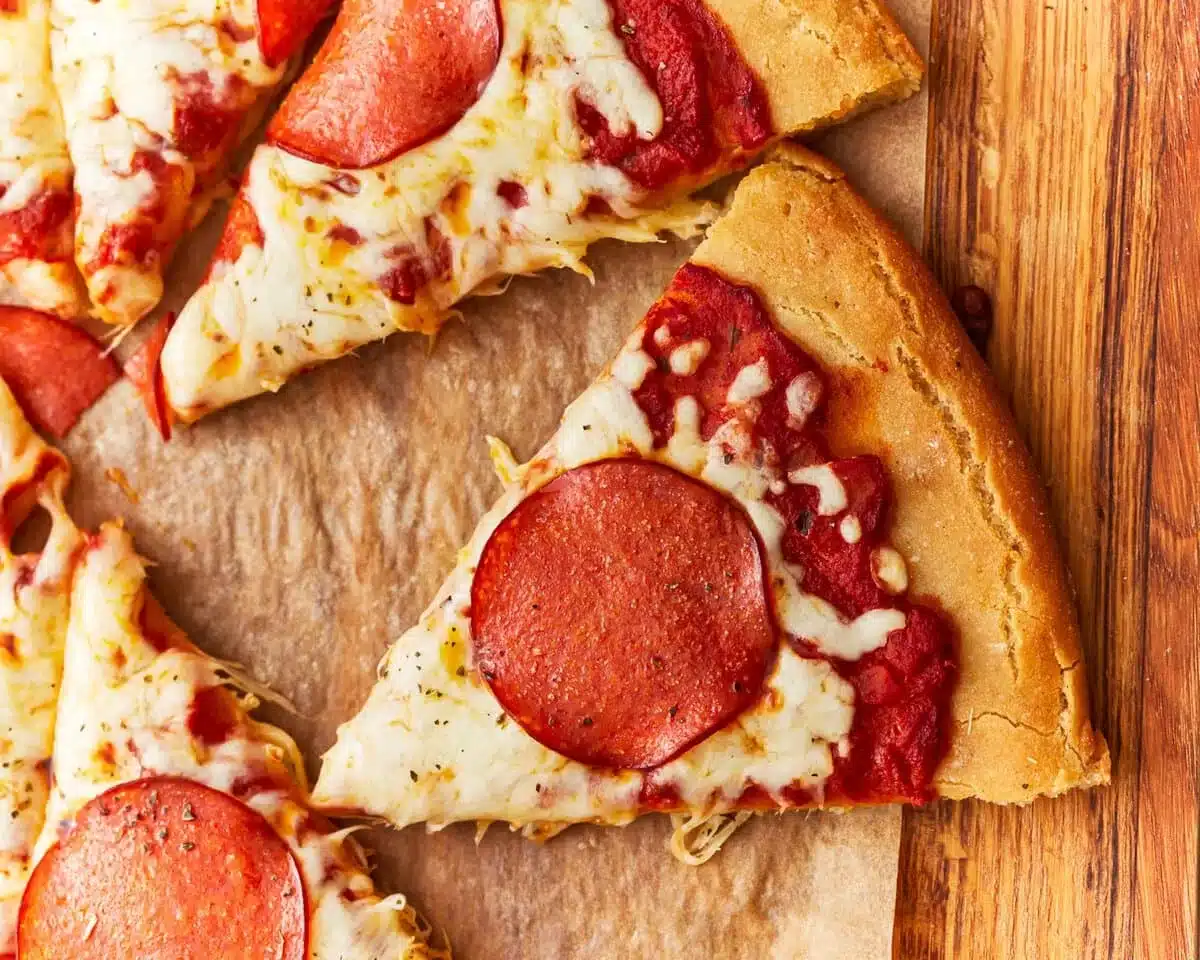
Bake for another 10 to 15 minutes at 425°F, until the cheese is melted and the crust is golden brown.
Allow the pizza to rest briefly before slicing.
Expert Tips for the Best Gluten-Free Pizza Dough
Beat the Dough Well
Gluten-free pizza dough needs thorough mixing to distribute the flour, liquid, and binders evenly.
The original recipe specifies mixing for 1 to 2 minutes after adding the wet ingredients.
A separate gluten-free baking technique involves continuing to beat the dough until it looks lighter and more aerated, sometimes described as a whipped appearance.
However, that longer mixing technique comes from a different dough formula. It should not automatically replace the original timing without testing the results.
Rest the Dough in the Refrigerator
An optional technique for particularly sticky gluten-free dough is to refrigerate it after mixing and rising.
A refrigerated rest allows the flour blend more time to absorb moisture and makes the dough easier to handle.
The original recipe does not require this extra refrigeration step, so it should be considered an optional adjustment rather than part of the standard method.
Work with Cold Dough if Necessary
If the dough is difficult to shape, cooling it briefly in the refrigerator may help.
Handle the dough gently and avoid adding large amounts of extra flour, which can alter the intended hydration.
Use Lightly Floured or Oiled Hands
Gluten-free dough tends to stick to fingers and work surfaces.
The original recipe includes 2 tablespoons of extra flour specifically for shaping.
You can also lightly oil your hands when working with sticky dough.
Choose the Correct Gluten-Free Flour Blend
For reliable results, choose a flour blend suitable for yeast baking and containing xanthan gum.
Avoid assuming that every gluten-free 1:1 baking flour will produce the same texture.
Measure Flour Carefully
Weighing 310 g of flour is preferable when possible.
If using measuring cups, spoon the flour into the cup and level the top instead of packing it tightly.
Check the Yeast
Use instant yeast that is within its expiration date and has been stored according to its package directions.
Avoid Overloading the Crust
Large amounts of wet toppings can make a gluten-free crust softer.
Drain ingredients such as roasted peppers, mushrooms, or other high-moisture toppings before using them.
Optional Tapioca Starch Experiment
A separate gluten-free pizza dough method suggests replacing ¼ cup (36 g) of its all-purpose gluten-free flour blend with tapioca starch to adjust chewiness.
That method also mentions Expandex modified tapioca starch, which has different hydration needs from regular tapioca flour.
Important: These substitutions are not tested for the original Recipnest formula. Do not automatically add extra water or replace flour in this recipe based on another dough formula.
How to Parbake Gluten-Free Pizza Crust
Parbaking means partially baking the pizza crust before adding the sauce, cheese, and toppings.
The original recipe uses a first bake of 15 minutes at 425°F.
Why Parbaking Helps
Gluten-free pizza dough is often softer and more hydrated than conventional pizza dough.
Baking the crust before adding toppings allows it to become more stable and helps reduce the chance of a soggy center.
Parbaking for Later Use
- Prepare and shape the dough according to the original recipe.
- Transfer the shaped crust to a pizza pan or baking sheet.
- Bake at 425°F for 15 minutes.
- Allow the partially baked crust to cool completely.
- Wrap securely in freezer-safe packaging.
- Freeze for up to one month for best quality.
Finishing a Parbaked Crust
When ready to make pizza, add sauce, cheese, and toppings to the prepared crust.
Bake according to the original finishing instructions, approximately 10 to 15 minutes at 425°F, until the pizza is hot and the crust is golden.
Alternative Short Parbaking Method
Another gluten-free pizza technique uses approximately 7 minutes at 400°F for an initial bake.
Because that technique comes from a different recipe, it should not replace the original 15-minute bake at 425°F without adjusting and testing the entire method.
Gluten-Free Pizza Topping Ideas
Once your gluten-free crust has been parbaked, you can customize it with your favorite toppings.
Classic Cheese Pizza
Spread gluten-free pizza sauce over the crust and add shredded mozzarella or your preferred pizza cheese.
Vegetable Pizza
Top with vegetables such as bell peppers, mushrooms, onions, or spinach.
Avoid adding excessive moisture to the crust.
Pepperoni Pizza
Use mozzarella, gluten-free pizza sauce, and pepperoni that is specifically confirmed gluten-free.
Dairy-Free Pizza
Use a dairy-free cheese alternative and check all other toppings for dairy ingredients.
Simple Herb Pizza
Add olive oil, garlic, and herbs for a lighter pizza without a heavy layer of sauce.
Important Gluten-Free Ingredient Checks
If you’re cooking for someone with celiac disease, carefully check packaged sauces, processed meats, seasoning blends, and other toppings.
The Celiac Disease Foundation’s guide to gluten sources and cross-contact explains why gluten-free ingredients and clean preparation surfaces both matter.
How to Freeze Gluten-Free Pizza Dough
This gluten-free pizza dough can be prepared ahead and frozen for future homemade pizzas.
Freezing Unbaked Dough
- Prepare the dough according to the original instructions.
- Allow the dough to complete its rise.
- Wrap it securely in plastic wrap.
- Place it inside a freezer-safe bag.
- Freeze for up to 3 months for best quality.
Thaw the frozen dough overnight in the refrigerator before shaping and baking.
Freezing a Parbaked Pizza Crust
For a convenient ready-to-top crust, bake the shaped dough for 15 minutes at 425°F.
Let the crust cool completely, wrap tightly, and freeze for up to 1 month for best quality.
How to Store Leftover Pizza
Transfer leftover baked pizza to an airtight container and refrigerate promptly.
Store cooked leftovers in the refrigerator for approximately 3 to 4 days, provided any toppings were handled and stored safely.
How to Reheat Gluten-Free Pizza
Reheat leftover pizza in the oven until thoroughly heated.
Microwaving is also possible, although the crust may become softer.
Gluten-Free Pizza Dough Troubleshooting
Why Is My Gluten-Free Pizza Dough So Sticky?
This recipe produces a sticky dough by design.
Use the extra gluten-free flour specified for shaping, work gently, or consider a refrigerated rest as an optional technique.
Why Is My Gluten-Free Pizza Crust Dry or Crumbly?
A dry or crumbly texture can result from the flour blend, measurement differences, or insufficient hydration.
Use the specified gluten-free flour amount and check that your blend is suitable for yeast baking.
Do not add excessive flour when shaping.
Why Is My Pizza Crust Too Hard?
Overbaking can produce a tougher or harder crust.
Check the baking time and avoid extending the second bake unnecessarily.
A slightly thicker shape is an optional adjustment if you prefer a softer center.
Why Didn’t My Gluten-Free Dough Rise?
Check the yeast’s expiration date, the water temperature, and the warmth of the proofing environment.
Water that is too hot may damage yeast, while an environment that is too cold can slow the rise.
Why Is My Gluten-Free Pizza Soggy?
Excess moisture from toppings or skipping the first baking stage can contribute to a softer crust.
Follow the original two-stage baking method and avoid overloading the pizza with wet ingredients.
Can I Use Any Gluten-Free Flour?
No. The original recipe specifies a gluten-free flour blend containing xanthan gum and suitable for yeast baking.
Different flour blends may absorb liquid differently and produce different results.
Gluten-Free Pizza Dough Recipe
This homemade gluten-free pizza dough uses a stand mixer, a short rise, and a two-stage oven baking method for a soft, chewy crust with golden edges.
Ingredients
Gluten-Free Pizza Dough
- 2½ cups (310 g) gluten-free all-purpose flour with xanthan gum
- 1 tablespoon (12 g) baking powder
- 1 teaspoon (6 g) salt
- 2¼ teaspoons (7 g) rapid-rise or instant yeast
- 1½ cups (360 ml) warm water, 110°F to 115°F
- 1 tablespoon (12 g) granulated sugar
- ½ cup (120 ml) olive oil
- 1 teaspoon (5 ml) apple cider vinegar
- 2 tablespoons (16 g) gluten-free all-purpose flour, for dusting
Recipe Instructions
- Prepare a warm proofing environment using the oven’s proof setting or a gently warmed, turned-off oven at approximately 100°F.
- In the bowl of a stand mixer fitted with a paddle attachment, combine the gluten-free flour, baking powder, salt, and instant yeast.
- Warm 1½ cups (360 ml) water to 110°F to 115°F.
- Stir the granulated sugar into the warm water until dissolved.
- With the mixer on low speed, pour the sugar water into the flour mixture.
- Add the olive oil and apple cider vinegar.
- Mix on low speed for approximately 1 to 2 minutes, until a sticky dough forms.
- Transfer the dough to a greased ovenproof bowl. Cover with plastic wrap and a clean towel.
- Allow to rise in a gently warm proofing environment for approximately 30 minutes.
- Remove the dough and preheat the oven to 425°F.
- Dust parchment paper with 1 tablespoon of the reserved gluten-free flour.
- Turn the dough onto the parchment and sprinkle with the remaining tablespoon of flour.
- Gently pat the dough outward into an approximately 15-inch circle, shaping a slightly raised edge.
- Transfer the parchment and shaped dough to a pizza pan or baking sheet.
- Bake the crust for 15 minutes at 425°F.
- Remove from the oven and add gluten-free pizza sauce, cheese, and your preferred toppings.
- Return to the oven and bake for another 10 to 15 minutes, until the cheese is melted and the crust is golden brown.
- Rest briefly, slice, and serve.
Recipe Notes
- Use a gluten-free all-purpose flour blend containing xanthan gum and suitable for yeast baking.
- Measure the flour carefully, preferably by weight.
- Use fresh instant yeast.
- Make sure the water temperature is approximately 110°F to 115°F.
- Expect a sticky dough; this is normal for the original formula.
- Use the specified additional flour for shaping.
- Allow approximately 30 minutes for the dough to rise.
- Shape on parchment paper rather than trying to stretch the dough like traditional wheat pizza dough.
- Bake the crust for 15 minutes at 425°F before adding toppings.
- Continue baking for 10 to 15 minutes after adding toppings.
- Freeze risen unbaked dough for up to 3 months for best quality.
- Freeze cooled parbaked crust for up to 1 month for best quality.
- The dough itself is egg-free and dairy-free, before toppings are added.
- Check packaged ingredients and preparation surfaces for gluten cross-contact.
Nutrition Information
Nutrition information depends on the flour blend, serving size, sauce, cheese, and toppings. The supplied article does not contain a verified nutritional breakdown, so no numerical values are provided here.
More Dinner Recipes to Explore
If you enjoy preparing homemade dinners, Recipnest also features additional savory recipes for family meals.
The following existing recipe links are preserved from the original article:
- Explore this related Recipnest recipe
- Discover another recipe on Recipnest
- Browse this Recipnest cooking idea
- Read another Recipnest recipe
- See this recipe from the Recipnest collection
- Explore another homemade recipe
- Discover this additional Recipnest recipe
- View another recipe on Recipnest
For a hearty family dinner, you can also explore our Classic Homemade Meatloaf Recipe or Chicken Sausage White Bean Skillet.
Dietary note: These two additional dinner recipes are suggested for general meal inspiration. Their gluten-free suitability has not been established here, so check the ingredient lists before preparing them for a gluten-free diet.
Frequently Asked Questions
What is the best gluten-free flour for pizza dough?
The original recipe recommends a gluten-free all-purpose flour blend containing xanthan gum and suitable for yeast baking. Pillsbury and Better Batter are mentioned as examples. Results may vary with different flour blends.
Why is gluten-free pizza dough so sticky?
Gluten-free pizza dough often contains more moisture and behaves differently from wheat dough. This recipe is designed to produce a sticky mixture that can be shaped using lightly floured hands and parchment paper.
Do you need to knead gluten-free pizza dough?
No traditional kneading is required for this recipe. The ingredients are combined in a stand mixer fitted with a paddle attachment.
Should gluten-free pizza dough rise?
Yes. The original recipe includes instant yeast and a rise of approximately 30 minutes in a gently warm environment.
Can I refrigerate gluten-free pizza dough before baking?
Refrigerating sticky gluten-free dough can make it easier to handle, but the original recipe uses a warm rise and immediate shaping. An additional refrigerated rest is an optional technique rather than a required step.
How do you make gluten-free pizza dough less sticky?
Use the reserved gluten-free flour for shaping, handle the dough gently, and work on parchment paper. Lightly oiled hands can also help.
Can I make gluten-free pizza dough without xanthan gum?
The original recipe is formulated for a flour blend that contains xanthan gum. Replacing that blend with one that does not contain xanthan gum may require a different formula, so results cannot be guaranteed.
Why is my gluten-free pizza crust crumbly?
Possible causes include an unsuitable flour blend, too much flour, or insufficient moisture. Follow the specified measurements and use a blend designed for yeast baking.
Why is my gluten-free pizza crust hard?
Overbaking can make the crust tough or dry. Follow the recommended baking times and monitor the crust as it finishes.
Do I need to parbake gluten-free pizza dough?
The original recipe includes a 15-minute first bake at 425°F before adding toppings. This helps the crust set and supports the toppings.
Can I freeze gluten-free pizza dough?
Yes. Allow the dough to complete its rise, wrap securely, and freeze for up to 3 months for best quality. Thaw overnight in the refrigerator before using.
Can I freeze a partially baked gluten-free pizza crust?
Yes. Bake the crust for 15 minutes at 425°F, allow it to cool completely, and wrap securely. The original recipe recommends freezing parbaked crust for up to one month.
Is this gluten-free pizza dough dairy-free?
The original dough contains no dairy ingredients. You can use suitable dairy-free cheese and toppings if preparing a completely dairy-free pizza.
Is this pizza dough egg-free?
Yes. No eggs are listed in the original dough ingredients.
How can I prevent gluten cross-contact when making pizza?
Use verified gluten-free ingredients and thoroughly cleaned utensils, preparation surfaces, and baking equipment. Keep wheat flour and wheat dough away from your gluten-free preparation area, particularly when cooking for someone with celiac disease.
PrintGluten-Free Pizza Dough

An easy recipe for gluten-free pizza dough. Make homemade gluten-free pizza with a thick and chewy gluten-free pizza crust.
- Prep Time: 10 mins
- Cook Time: 30 mins
- Total Time: 70 mins
- Yield: 1, 1 gluten-free pizza dough 1x
- Method: Main Course
- Cuisine: Italian
Ingredients
- 2½ cups gluten-free all-purpose flour with xanthan gum
- 1 tbsp baking powder
- 1 tsp salt
- 2¼ tsp rapid yeast/instant yeast
- 1 cups warm water (110°-115° (43-46°C))
- 1 tbsp granulated sugar
- ½ cup olive oil
- 1 tsp apple cider vinegar
- 2 tbsp gluten-free all-purpose flour, for dusting
Instructions
- Preheat your oven to the proofing setting. If your oven does not have a proofing setting, heat the oven 200°F (93°C). Once it gets to 100°F (38°C), turn off the oven.
- Combine the gluten-free all-purpose flour, instant yeast, baking powder, and salt in the bowl of a stand mixer fitted with the paddle attachment.
- Warm the water in the microwave for 30-45 seconds to 110°-115°F (43-46°C). I use a thermometer to check the temperature of the water. If the water is too hot, it will kill the yeast.
- Add the sugar to the warm water and stir until it is dissolved.
- Pour the warm sugar water into the gluten-free flour mixture and mix with your mixer on low.
- Add the olive oil and apple cider vinegar to the gluten-free dough mixture and mix on low speed for 1-2 minutes, or until the dough starts to form. The gluten-free pizza dough will be very sticky.
- Place the dough in a greased ovenproof bowl and cover with plastic wrap. Cover the dough with a kitchen towel and place in your warm oven for 30 minutes to rise.
- Remove the dough from the oven and preheat the oven to 425°F (218°C).
- Pour 1 tablespoon of gluten-free all-purpose flour onto a large sheet of parchment paper. Spread the gluten-free flour into a circle the size of the pizza crust (15″).
- Turn the bowl over on top of the floured parchment paper. Sprinkle 1 tablespoon of gluten-free all-purpose flour on top of the dough. Gently pat the dough ball in an outward motion. Work from the middle and push to spread the dough out to the edge to make a 15″ circle. Use your fingertips to press down into the dough to form the crust edge. Use your hands to finish shaping and rounding the edges.
- Place the parchment paper with the dough on a pizza pan or baking sheet. Bake for 15 minutes.
- Remove the crust from the oven and top with the gluten-free pizza sauce, cheese, and your favorite toppings.
- Bake the crust for an additional 10-15 minutes, until the cheese is melted and the crust is golden brown.
- Store leftovers in an air-tight container and refrigerate. Reheat leftovers in the oven or microwave.
Nutrition
- Calories: 169 kcal
- Sugar: 2 g
- Sodium: 302 mg
- Fat: 10 g
- Saturated Fat: 1 g
- Carbohydrates: 20 g
- Fiber: 3 g
- Protein: 3 g